Tutorial
Exploring (Redacted Name) API via The Next Leg
As a developer, tinkering with APIs and creating cool stuff is always exciting. In this blog post, we'll explore how to interact with (Redacted Name) via an API using The Next Leg. The Next Leg allows you to interact with (Redacted Name), a popular AI image generation tool, through an API. We'll use Postman to make requests, receive responses via a webhook URL, and test out the Imagine command.
Getting Started
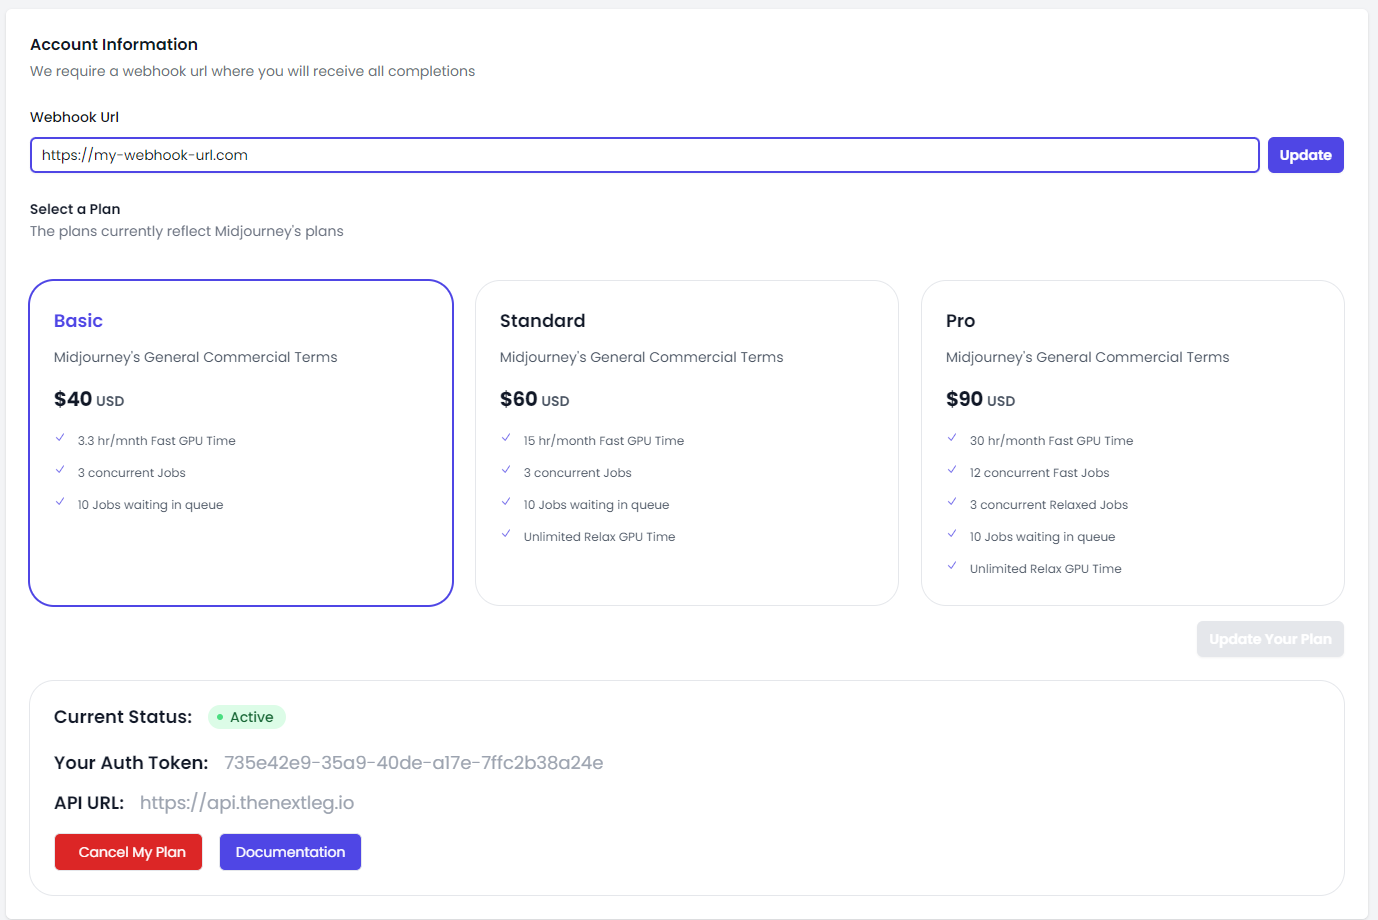
Before we get started, we need to make sure that we're authenticated and have an API URL and auth token. Once you've signed up for The Next Leg, you can find your API URL and auth token in the Your Account section of your account. It's important to keep these credentials secure and private. We'll also need a webhook URL where we'll receive the response from (Redacted Name). You can use a service webhook.site that will generate a temporary URL for you.
A webhook is a way for an application to provide other applications with real-time information. When a certain event occurs in the source application, it sends a payload of data to a specified URL, triggering a predefined action in the receiving application. This allows for seamless integration between different applications and in this instance is where you'll receive the response from your (Redacted Name) requests.
Making Requests
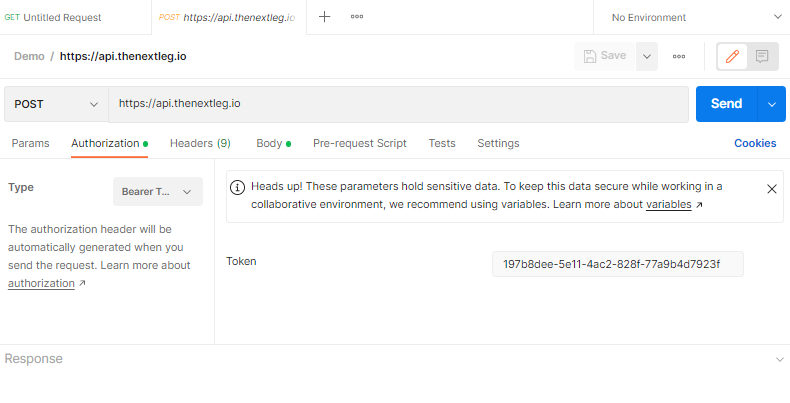
For making requests, we'll use Postman. Postman is a free tool that allows you to test out API endpoints and save requests. It's easy to use and can be found online. Once you've opened up Postman, create a new request and set the request method to 'POST'. Enter the API endpoint URL https://api.thenextleg.io
Next, we need to add some headers to our request. We'll need to include our auth token in the 'Authorization' header. This is a bearer token, so make sure to include the 'Bearer ' prefix before your token.
Testing the Imagine Command
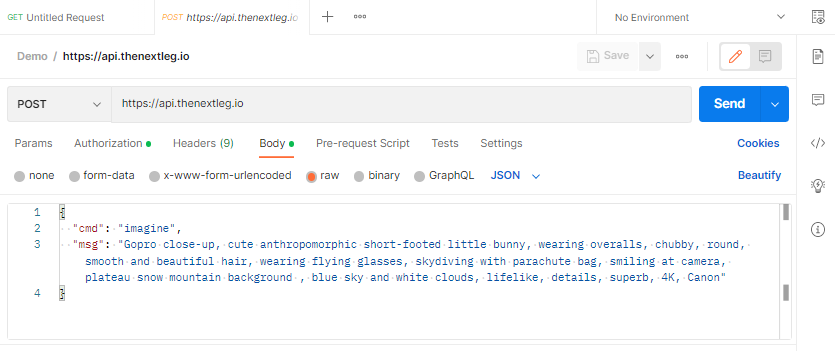
Now, we're ready to add some parameters for the Imagine command. We can find the required parameters in the Documentation provided by The Next Leg. We are now on v2.
Let's test out the Imagine command using a prompt your choice. Put your prompt in the 'cmd' parameter in the request body. Send the request and wait for the response to be sent to your webhook URL. Once you've received the response, you can check the generated image in the specified URL! Feel free to experiment with different prompts and parameters to generate unique and creative AI images.
{
  "cmd": "imagine",
  "msg": "<your-prompt-here>"
}

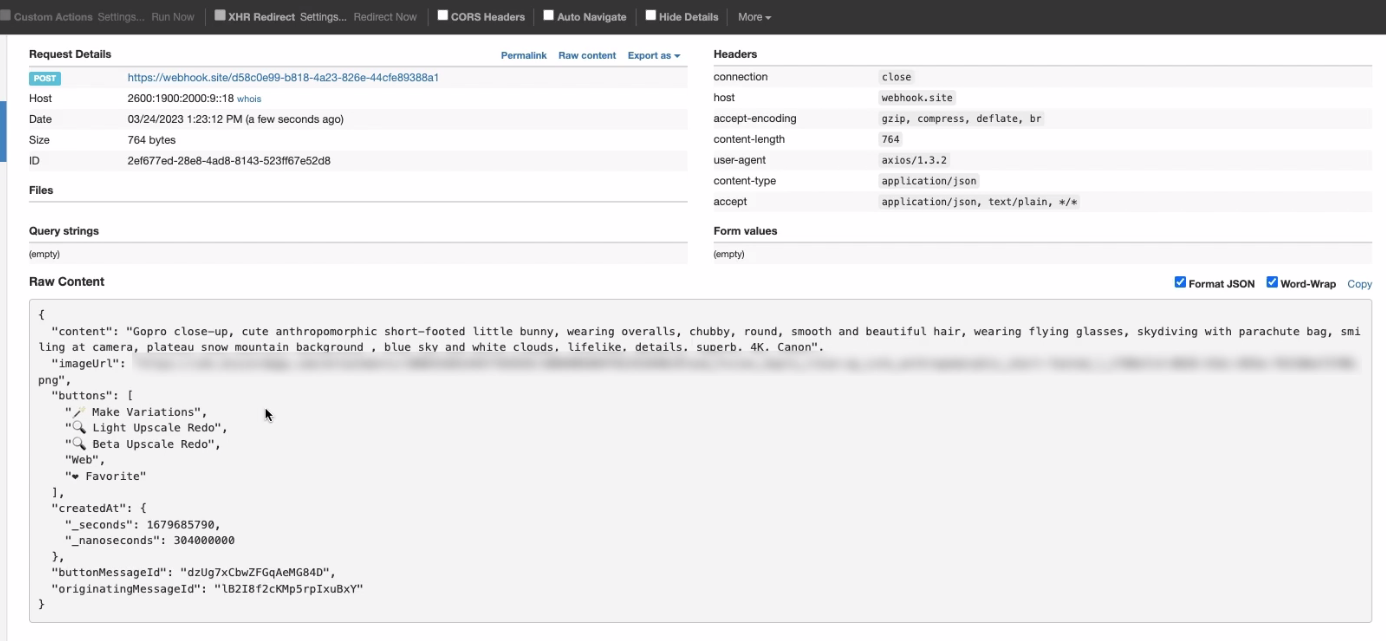
Next, we'll take a look at how to upscale an image. If we look at the response body it provided us with some buttons, as well as a buttonMessageId.
Upscaling an Image
Similar to the previous request, we instead now use the `buttonMessageId` provided previously along with a `U1` in the button field to upscale the image.
{
  "button": "U1",
  "buttonMessageId": "<your-message-id-from-previous-response>"
}
The response should come with the content, image URL, more buttons that you can use, as well as a button message ID and originating message ID. The originating message ID should match with what you received earlier, and it should come with a new image URL.
Conclusion
And that's it! With The Next Leg, you can easily interact with (Redacted Name) via API and create cool images. Whether you're a developer or just someone who loves playing around with APIs, The Next Leg is definitely worth checking out.